
Why Are Weeds Growing Between My Pavers? The Real Culprit
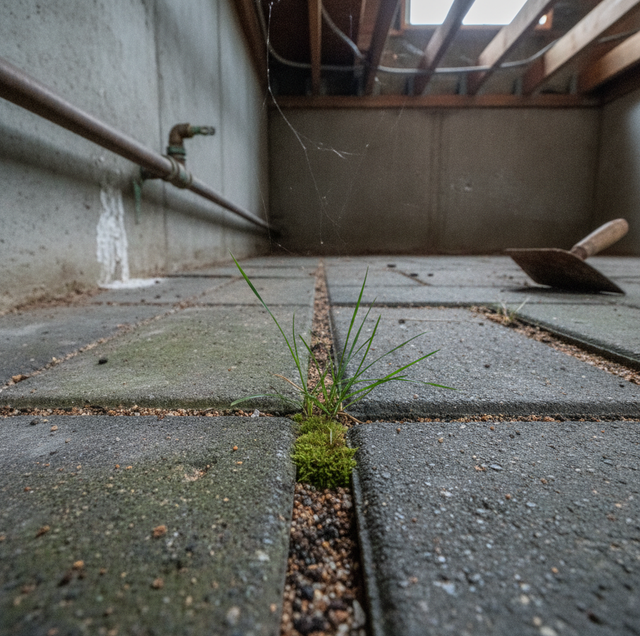
You pull them one weekend, and by the next month, a fresh green fringe threads up between the stones again. It is one of the most common frustrations with a paver patio or walkway, and it leads a lot of people to a wrong conclusion: that the pavers were installed badly, that the ground underneath is coming apart, or that weeds are muscling their way up from the soil below. That mental picture is what makes weeds feel like a big, expensive problem.
Most of the time, it is not. Weeds between pavers are almost always a surface issue happening in the joints, not a failure deep in the base. Once you understand where the seeds actually come from, the fix stops being an endless cycle of yanking and starts being a one-time correction that holds for years.
Where the Weeds Are Actually Coming From
Think of a paver joint less like a crack and more like a narrow planter box. Over time, anything light enough to travel on the wind settles into those gaps: leaf fragments, grass clippings, fine airborne soil, and, critically, seeds. In a dry, dusty climate, dust and windblown seed are constant, and both land in the joints and stay there. Add a little moisture from irrigation overspray, rain, or morning humidity, and a seed sitting in that pocket of collected organic material has everything it needs to sprout.
That is the whole mechanism. The weed you see is not rooted in the soil under your patio. It is rooted in the thin layer of debris and loose sand sitting in the joint on top of the pavers. This is why the same weeds keep coming back after you pull them: pulling removes the plant but leaves the joint open and full of the exact material the next round of seeds needs.
A properly built paver installation works against growth from below. The pavers sit on a compacted aggregate base and a bedding layer, and that compacted structure is dense enough that seeds from underneath have almost nothing to work with. So the direction of the problem is top-down, not bottom-up. Once you accept that, the fix points itself at the joints.
Why the Joints Stopped Doing Their Job
If the joints are catching debris and holding seeds, something changed about the joints themselves. Usually, it is one or more of these.
The joint sand washed out or was never locked in- Many patios are filled with plain masonry or jointing sand. That sand is loose by design, and rain, irrigation, and pressure washing gradually flush it out of the gaps. As the sand level drops, the joint turns into an open trough that collects debris and gives seeds a soft, loose place to root.
Organic debris kept building up- Under trees, near planters, or anywhere leaves and clippings gather, the joints fill with organic matter faster than they can be swept clear. That layer is essentially potting mix sitting in a line across your patio.
Shade and moisture stayed in the picture- Joints that stay damp, whether from shade, drainage patterns, or a sprinkler that clips the edge of the patio, germinate seeds far more reliably than joints that dry out fast.
Regular sand was used instead of polymeric sand- Standard sand does not bind. Polymeric sand contains additives that, once activated with water, set up into a firm joint filler that resists washout and gives seeds much less loose material to grab. Using ordinary sand is the single most common reason joints keep failing.
The surface was never sealed, or the seal wore off- A sealed surface helps hold the joint sand in place and sheds water and debris more readily, so an unsealed patio tends to shed its joint sand and collect grime faster.
The Fix That Actually Lasts
Because this is a joint problem, the durable repair is a joint repair. The sequence matters.
First, deal with the existing weeds. Pull them by hand where you can get the full root, or spot-treat them with a weed killer used strictly according to its label. If you use an herbicide, keep it off desirable plants, protect nearby soil and roots, follow the product's contact and drying times, and store and handle it as the label directs. Give treated weeds time to die back fully before you disturb the joints.
Next, clean the joints out. This is the step people skip, and it is the one that makes the repair permanent. Scrape and sweep the old, loose sand and packed debris out of the gaps so you are down to a clean, open joint. A joint knife, a stiff brush, or a controlled pass with a pressure washer all work; if you pressure wash, let everything dry thoroughly afterward.
Then refill the joints with polymeric sand. Sweep it into the gaps, tamp or vibrate it so it settles, brush the surface clean so no haze is left on the paver faces, and activate it with a light mist exactly as the product directs. When it cures, it hardens into a firm joint that locks the pavers laterally, resists washout, and denies seeds and ants the loose material they rely on.
Finally, seal the surface once the sand has cured. A sealer helps hold that new joint sand in place and makes the whole surface easier to keep clear. From there, maintenance is simple: sweep the joints regularly so leaves and clippings never build into a seedbed, and clear organic buildup before it packs down.
One honest caveat. Polymeric sand is not permanently weed-proof. It dramatically cuts down what can germinate, but a stray seed can still find a speck of surface grit or a hairline gap, especially as the joint ages. The difference is scale: instead of a constant green fringe, you get the occasional stray weed that pulls out in seconds, plus an easy touch-up of sand every few years.
Telling a Joint Problem From a Real Base Failure
It is worth knowing when weeds are pointing at something bigger. A genuine base failure shows itself in the pavers, not just the joints. Look for pavers that have sunk into a low spot, lifted or tilted so edges no longer sit flush, rocked underfoot, or drifted apart into widening gaps. Those symptoms mean the base has settled, shifted, or heaved, and no amount of new joint sand fixes a base that has moved.
Plain weeds in otherwise flat, stable, evenly spaced joints are rarely a base problem. They are the top-down joint issue described above. If the surface is level and solid and only the joints are green, treat the joints. If the surface itself is moving, that is a separate repair, and re-sanding is not the answer for it.
A Maintenance Aid Worth Knowing
Once your joints are clean and filled with polymeric sand, a pre-emergent herbicide can add a layer of prevention. Applied according to its label, a pre-emergent is designed to stop seeds that land in the joints from germinating in the first place, which pairs well with a firm, well-filled joint. Treat it as a maintenance step on top of good joint sand, not a substitute for keeping the joints filled and swept. A pre-emergent applied over open, sand-starved joints is doing half the work of a repair that was never finished.
The through-line is the same at every step. Weeds between pavers are a story about the joints on top, not the ground below. Keep the joints firm, filled, sealed, and swept, and the seeds that blow in have nowhere to take hold.
Frequently Asked Questions
Are the weeds growing up from under my pavers?
The one exception to the usual top-down cause is an aggressive spreading weed like nutsedge or Bermuda grass rooted in an unedged bed nearby. These can travel laterally under the edge restraint and surface right at the perimeter of the patio, unlike ordinary seeds that simply land in the joints from above. You can spot the difference by where it shows up: perimeter-only growth near a planting bed points to a runner, while scattered weeds across the field are the windblown kind. A crisp edge restraint or a physical barrier at that border is what stops the traveling type.
Does polymeric sand actually stop weeds?
Polymeric joints usually need a light touch-up every few years as they weather and lose a little material at the surface. Getting the installation right matters as much as the product itself: if the joints are over-watered during activation, the binders can wash up onto the paver faces and leave a stubborn haze. Sweep the faces clean and mist rather than flood so the binder sets in the joint where it belongs. Done properly, the cured joint gives seeds far less loose material to grab than plain sand ever could.
Why did the joint sand wash out in the first place?
Close-range pressure washing is the single fastest way to blow joint sand out of the gaps, so holding the wand too near the surface undoes the joint in one pass. Joints along slopes or natural drainage paths erode first, since that is where runoff concentrates and carries the sand away. Those low and sloped spots are the ones that reweed soonest, so they are worth inspecting after any wash-down. Keeping the nozzle back and at an angle protects the fill you already have.
Can I pull the weeds and be done?
Hand-pulling often lifts loose jointing sand out along with the root, which widens the gap and leaves it emptier than before. Pulling without re-sanding actually makes the next crop easier to take hold, because a deeper, looser joint holds more debris and moisture for the next seed. If you must pull between repairs, sweep a little fresh sand back into the gap afterward to keep it from opening up. The real reset is clearing and refilling the whole joint, not tugging plant by plant.
Does sealing the pavers help with weeds?
A penetrating sealer soaks into the stone without filling the joint, while a film-forming sealer sits on top as a surface layer, and the two behave differently on a patio. Either type is applied after re-sanding, never in place of it, since the sealer helps hold new joint sand in position rather than acting as a weed barrier on its own. Choosing between them comes down to the look you want and how much surface sheen you can live with. The joint fill underneath is still doing the real work of denying seeds a foothold.
Is a pre-emergent worth using on a paver patio?
A pre-emergent stops seeds from germinating but does nothing to weeds already up and growing, so it is a prevention tool rather than a cure. Timing it right after re-sanding lets it protect the fresh, clean joint before new seeds arrive, and reapplying on the label's cadence keeps that protection from lapsing. Pairing it with a firm, filled joint gives you two defenses working together instead of one. Applied over open, sand-starved joints, though, it is only finishing half of a repair that was never completed.
Book a joint repair and re-sanding assessment — stop the weeds at the source instead of pulling them again. North Valley Stone Supply LLC serves Phoenix, Scottsdale, and Tempe. Call (623) 244-8657.